You may be wondering how to eliminate shadows in product photography. There are a few basic steps to follow. First, use one type of light in your photographs. Then, you can add a secondary light source to counterbalance natural shadows created by the objects. These secondary sources are known as “fill light,” and they provide the necessary balance in your pictures. In addition to avoiding the use of direct sunlight, they can also reduce the sharpness of your photos.
Using a lightbox
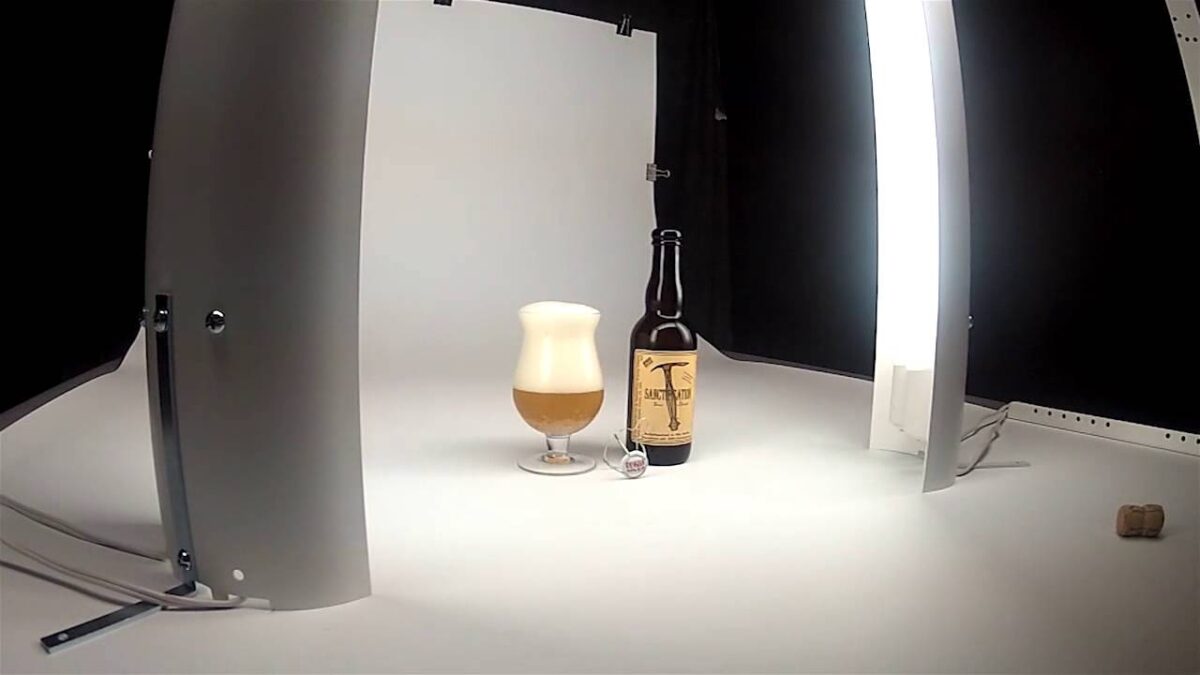
A lightbox is an essential component of product photography. Not only does it eliminate shadows, it also helps you create a more appealing shot. Using a lightbox is much cheaper than hiring a professional photographer. However, using a lightbox will require you to spend more time on the setup. It’s better to experiment with composition, lighting, and camera settings until you find a look that works for your brand.
One option is to use two lights on a lightbox to eliminate shadows. Using two lights is better as it provides even lighting throughout the image. To use the lightbox, position the camera in front of the open end of the light box. Be sure to use a tripod to avoid camera shake. This way, you won’t have to worry about moving your camera around as you shoot.
Another option is to use a lightbox. A lightbox diffuses the lighting and acts as a white background. The result is a bright and vibrant product photo. Another advantage is that a lightbox is easy to use. All you need is a cardboard box, packing tape, and a product to photograph. It’s important to follow instructions carefully before beginning a project.
Using a reflector
When lighting a subject, one of the most important aspects of a photography session is avoiding shadows. A reflector allows you to control the amount of light that hits your subject. These reflectors can be used to fill in shadows and reduce creases in your pictures. The best way to position a reflector is at a 90-degree angle to the light source. This will allow you to use a lower light source to create a flattering shadow, as well as get the best quality lighting for your subject.
There are four types of reflectors: silver, gold, and white. Gold reflectors are usually made with two-sided covers, with a black side for blocking light. These reflectors are useful for product photography because they are cheap and versatile, enabling you to switch them out as necessary. Using reflectors can dramatically improve the overall look of your images. This article will discuss the four types of reflectors available in the market and what you should use for your specific photograph.
Using a reflector to eliminate shadow problems in product photography is a great way to ensure your images are free from unwanted shadows. A reflector can either be large or small, and will help you get the best lighting possible. You’ll also need to determine how you plan to use your reflectors and how to use them to get the best results. A good way to get started is to practice on a product and observe the way the light hits the subject. You may also want to hire a photographer to hold the reflector or invest in a reflector stand.
Using a diffuser
Using a diffuser to eliminate shadow is an effective way to get softer, more consistent lighting for your products. It softens and diffuses light, eliminating harsh shadows and glare. However, diffusers aren’t necessary in every lighting situation. In some cases, sunlight alone will provide adequate light for product photography. However, the following tips will help you get the best lighting for your products and avoid distracting shadows.
A diffuser reduces contrast and increases colour saturation. In product photography, a diffuser placed between the light source and the subject can make the light more even. You can find a collapsible diffuser at a camera store. You can use it on location as well. It’s a good idea to check the guidelines and measurements provided by your camera manufacturer before purchasing a diffuser.
One of the best types of diffuser is a lastolite light reflector. Its translucent surface diffuses the light in a soft way and makes it more pleasing for the eye. Lastolite light reflectors are great diffusers, but aren’t as portable as collapsible ones. You can also choose between black and white diffusers. They can also be colored.
Another way to eliminate shadows in product photography is to place a diffuser between the light source and the object. If the light source is too far away, place two reflectors on each side of the object. They should be out of the camera’s field of view. You can also experiment with the light settings to see which affects the shadows the most. Higher light will cast shorter shadows, and lower lights will cause longer shadows.
Avoiding direct sunlight
When shooting a product, avoiding direct sunlight will eliminate unwanted shadows. The sun’s harsh light will also add colour saturation and produce high contrast images. Fortunately, there are ways to avoid the harsh light, and this tip works in both indoor and outdoor settings. Whether you’re taking a portrait of a subject or a shot of a flower, a diffuser will soften the light for the best results.
Another option for eliminating shadows in product photography is using a white-card sheet behind the product. This light-reflecting sheet will bounce light back and eliminate shadows. This is probably the easiest and least expensive way to reduce shadows in your photos. Unfortunately, this solution may not work for you if you don’t have the space to move the product. If you want to eliminate shadows, you can use a white-card piece, but this method isn’t always feasible.
To avoid harsh shadows, you can also turn your subject into the light. This will minimize the size of the shadows, since half of the face of the subject is in the shadows. Alternatively, you can place the subject in a shaded area, such as a tree or a building. But this method will result in an under-exposed image. Regardless of the approach, it’s essential to avoid the harsh light of direct sunlight.
Using large props
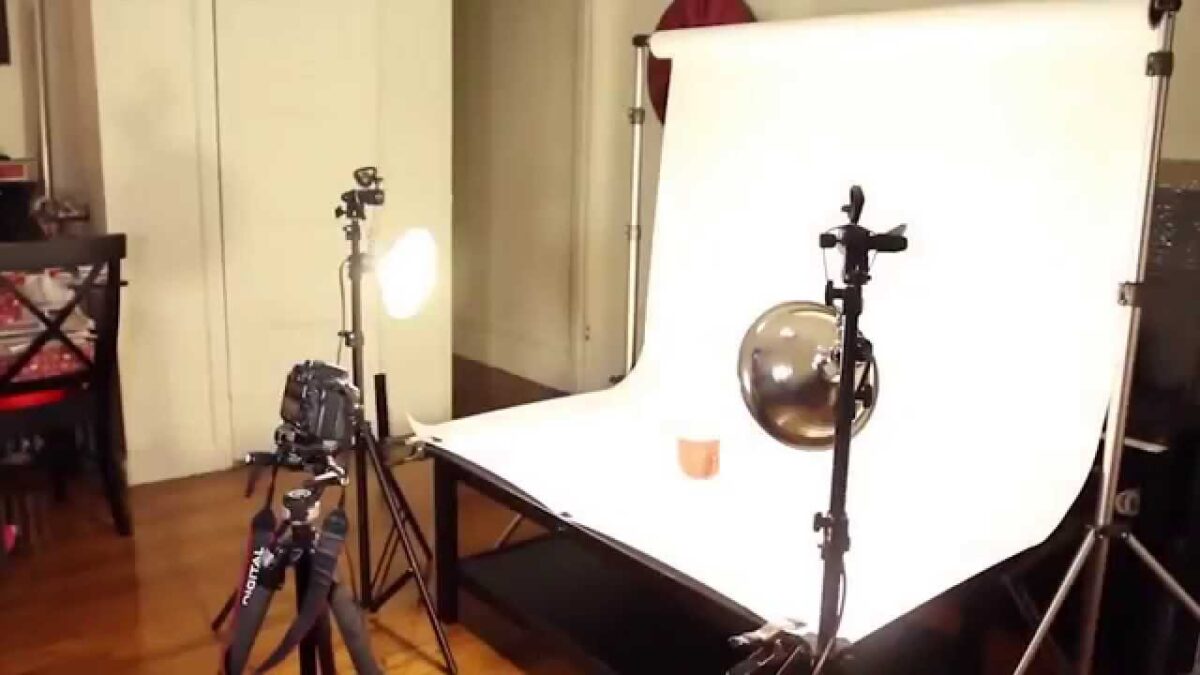
Lighting plays a crucial role in creating stunning product photographs. However, many photographers don’t take the time to understand how light affects product images. While post-production lighting is easy to tweak, proper lighting is essential to achieving the highest quality image. Proper lighting is important for a number of reasons, including how shadows are created. Generally speaking, the larger the light source, the harder the shadows will be.
To begin with, set up your shoot in a manner that mimics how the product is used. For example, if the product is a shoe, stuff the inside with paper to give it a firm shape. In the same manner, if you are shooting clothing, consider using a mannequin to ensure that it fits correctly. This will prevent shadows and other undesirable elements from affecting the product’s appearance.
Using an online image editor
While adding shadows to a product photograph can add depth and visual appeal, it also increases the post-production overhead. Luckily, it’s fairly easy to eliminate shadows from your product photos with an online image editor. For example, Pixelz has edited millions of photos, so it’s safe to say it’s very good at this. Whether you’re using an online image editor for your next shoot or you’re working with a professional photographer, you can use Pixelz to get the job done right.
If you’re not a professional photographer, using an online image editor is a simple way to get the job done. One tool is LunaPic, a free web-based picture editor. You can upload photos or paste a URL into it. Once you’ve done this, you can choose the tool to use to remove shadows. LunaPic’s Cut Out tool is particularly useful for removing shadows from product photography.
After importing your photo into TouchRetouch, you can use the clone tool to remove the shadows. All you have to do is mark the shadow area with the tool and touch it to remove it. Once you’re done, you’re ready to use the tool’s other tools to improve your photo. TouchRetouch costs $2.00, but it has thousands of reviews and a 4.6-star rating.